Wii U game console is a much older system but loyal users are still obsessed with the experience. Are you are one of those “loyal users”? Do you wish to play Wii games as well? If so, then you must want to connect your old console to your laptop. If you do not know how to connect the Wii U console to your laptop then stick around! I will walk you through some easy and straightforward steps guaranteed to do just that.
If you do not want to connect your Wii console to your laptop through a USB port then you must opt for a wireless connection. A wireless network is the only viable way to connect your Wii U game console to your personal computer.
Table of Contents
How to Connect Wii U to a Laptop
Following are the steps to ensure proper connection in a hassle-free way:
- Turn on your game console
- Go to the channel menu
- Scroll to your laptop’s Wii logo with the help of your remote
- Press the “A” key to select
- Then go to “Device” and enter ” System Settings”
- Go to Wii Settings
- Under “Internet” select “link settings”
- Select the first available internet connection
- Find an ideal wireless connection
- Select the “Access Point Search” feature
- Wait for a few moments
- Locate your Wi-Fi connection and enter your password
- Save settings
- Authenticate the link
- Check the connection
If you follow these steps then you will be able to successfully connect your Wii U console to your laptop, wirelessly. Through this, you will be able to play all the latest Wii games.
Besides a wireless connection, there are other ways of connecting the Wii console to your laptop. Your Wii console can be connected to your laptop via a Bluetooth driver.
This may be an easier and accessible way of playing games on your Wii. I will walk you through those steps so you may choose the best connection for you.
Connect Wii U To Laptop Wirelessly
To connect Wii to your personal computer without a USB plug, there are certain steps you need to take. The benefit of choosing this method of connection is that with Wifi, you can browse, update, and participate in any online activities.
Following describe the steps you need to take to connect your Wii U to your laptop wirelessly:
- Initially, when you connect Wii console, you must scroll down to your Channel menu. Using your remote, scroll to your laptop’s Wii logo using the remote.
- Select “Device” and go to the Wii Settings. From there you will press the Internet.
- Choose your appropriate link settings by selecting the first available connection. This connection will be saved with the name “Connection 1” if this is the first time you are connecting your Wii U to laptop.
- Now, locate the desired connection, and select the “Access Point Search feature”. After a few moments, you will be able to identify your Wi-Fi connection. Enter the password to get complete access.
- Save your settings when the prompt pops up on your laptop monitor. After authenticating the link, run a connection test.
If you pass the connection test, then it means the procedure was carried out successfully. Your Wii U should now be connected for the ultimate gaming experience.
Connect Wiimote to Your Laptop Via Bluetooth Driver

Wiimote has the ability to do more than just connect to your Nintendo. So, by connecting your Wiimote to your laptop, you will be able to access a wide array of opportunities.
Luckily, Wiimote connects your Wii through a Bluetooth device. The Bluetooth driver is a “Broadcom 2042 chip“.
This driver is perfect for gadgets that follow the Bluetooth Human Interface Device standards. Such gadgets include keyboards and mics.
Benefits of Wiimote
Following are some of the Pros of using Wiimote:
- Wiimote transmits large amounts of data to the Wii.
- Certain features are even unavailable on Nintendo
- Via Bluetooth, you can attach your Wiimote to a laptop with any Operating system
- You will be able to connect to a vast range of apps and games pre-designed for Wiimote
Wiimote projects are worth trying. To practice the project, you can download the software and try it out yourself.
Essentials to Play Wii Games
You will only be able to connect to your console if your laptop has an internal Bluetooth drive. Few new laptops come with an internal Bluetooth adapter.
The majority need an external Bluetooth dongle. Be sure to check your laptop’s specifications before you carry out the rest of the steps.
If you need a Bluetooth adapter, then you can find the one that works best for you here. Bluetooth adapters are cheap and have an in-built Bluesoleil driver. If this feature is not pre-installed, then you should download it.
Connect your Wiimote
Following describes the step-by-step procedure:
- Open your Bluesoleil software and put on your Bluetooth adapter if you do not have an internal Bluetooth adapter.
- Click the 1+2 buttons on your Wiimote simultaneously.
- Press the center of the orange circle.
- Wait a few seconds.
- Make sure the LEDs of your Wiimote are blinking when in use.
- When your Wiimote is spotted, the name “NINTENDO-RVT-CNT-01” should pop up on your laptop screen.
- Click the 1+2 buttons simultaneously again.
- Right-click the Wiimote icon.
- Select “Refresh” services.
- The Human Interface Device (HID) icon will pop up at the upper end of the window.
- Select the HID icon.
The Wiimote icon and HID button icon should be highlighted green. You should be able to see a dotted green line from the Wiimote icon to the middle orange circle. This is the indication that the connection has been successful.
Now you will be able to work on programs like:
- WinRemote
- GlovePie
- Wiinstrument
If Bluesoleil can’t pick up your device then disconnect your adapter and connect it again. Check the middle orange circle to see if it is detected.
Using Your Laptop As a Monitor For Wii
Essentials to set up with Nintendo Wii Console
To use your laptop as a monitor for your Wii console, you will need the following:
- A Wii to USB adapter to help transmit the USB signal to a USB 2.0 port.
- A laptop with a USB port.
- A proprietary cable to connect with a monitor or TV.
Steps to set up Laptop as Display for Wii
Following are the steps to use your laptop as a monitor for your Wii console:
- Unplug the AV cable from your console
- Connect the Wii plug to one side of the adapter
- Put the other side of the USB cable into any free port on your PC
- Turn on your laptop and Wii
- Double-click the drive outlined for the adapter connection
- Press the “Start” button to select the “My Computer” option and click the drive
The drive should show up as an icon on the monitor screen for Apple computers.
Attach Wii U Gamepad To Laptop
The Wii U Gamepad has a touchscreen display that is meant to enhance your gaming experience on your laptop. To attach your Wii U gamepad to your laptop you will have to follow these steps:
- Turn on your Wii U.
- Set up your laptop to work as a web server.
- Click Windows + Q letter on your keyboard.
- Enter Windows features.
- Click the “Turn Windows features” on or off in the search bar.
- Go to Internet Information Services.
- Check the box and select “Ok” to add the feature.
- Wait a few seconds.
- Your laptop should be able to run as a local webserver.
- Now click Windows + R letter on your keyboard.
- Type CMD to start the command prompt on your laptop screen.
- Under “IP Configuration” you should see all available network devices and their IP addresses.
- Find the “IPV4” address.
- Next, you will connect Wii U by HDMI port on the laptop.
To connect your Wii U by HDMI input on your laptop, you should read the following section.
Connect Wii U By HDMI On Laptop
Follow these straightforward steps:
- Connect your Wii U console to your laptop via the Gamepad already attached to your console
- Connect your laptop with the Wii U to establish a WPS connection
- Get a computer host and sync it directly to your Gamepad
Record Wii U Gameplay with Capture Card
For this, you must follow this hassle-free procedure:
- Connect Wii U to Your Computer
- Launch TuneFab Screen Recorder by choosing “Video Recorder” to record your Wii U gameplay
- Set Recording Region by pressing the “Customs” button and selecting 1080p (1920 x 1080)
- Configure Video Recording Settings under the “preferences” option in the “gear” icon
- Start recording Wii U Gameplay
Now you should be able to preview and save recorded videos.
FAQs
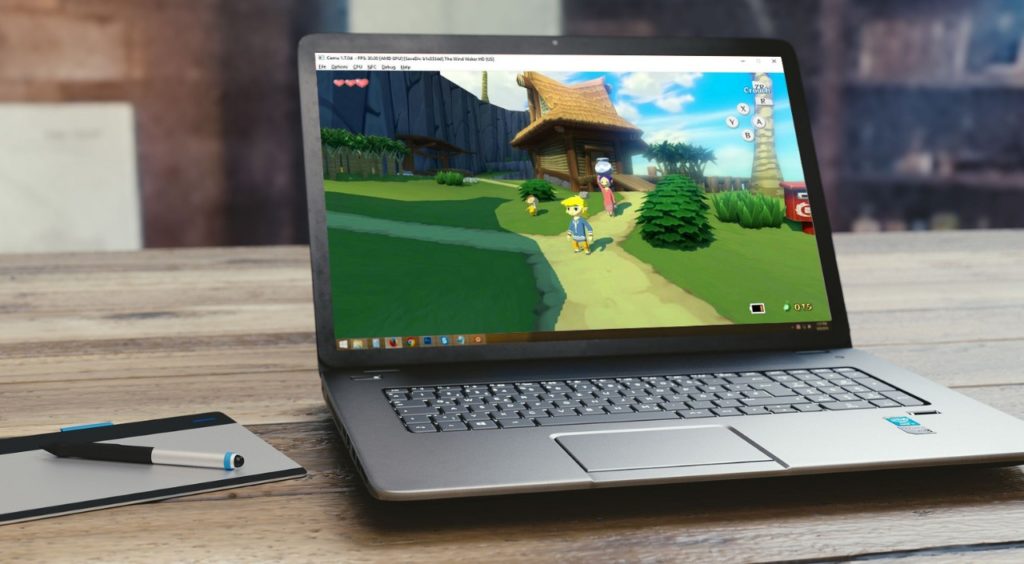
What are the Pros of using a Dolphin emulator?
Dolphin emulate Wii offers an easy way to play Wii games on your device. Since it is a very user-friendly open-source application you will only need a laptop with discreet or pre-installed graphics.

Can One Stream Wii U to PC?
Yes. All you will need for this is a capture card or capture box.
Can a User Connect Wii Console to Computer Via USB?
Yes. Just follow these steps:
- Remove the AV cable from the Wii console
- Connect the Wii plug and Wii via adapter
- Connect adapter cable into a free port on the device
How can Wii Games be Played on PC?
Wii U emulator is a very efficient software that may help you to play games on PC. The best recommended Wii U emulator for this purpose is the “Cemu emulator”.
What Do I Need for Recording Wii U Gameplay?
You will need the following:
- A Wii U console
- Capture card
- HDMI cables
- USB to USB-C cable
- A Compatible PC
- Wii U Screen Recorder